11. Managing Images
In a cloud environment, Virtual Machines are instantiated from images. These images are registered in an Image Management Service, in our case provided by the Glance OpenStack component.
There are several types of images:
Public images
These are images provided by the CloudVeneto administrators. They are visible to all users.
Private images
A private image is owned by a specific project and cannot be viewed or used by other projects.
Shared images
A shared image is a private image that can be viewed/used by specific other projects that the image owner adds as “members” to the image.
Community images
A community image is an image uploaded by a project, and such project wants other projects use such image, but isn’t interested in maintaining a relationship with these tenants by making them image members.
11.1. Public Images
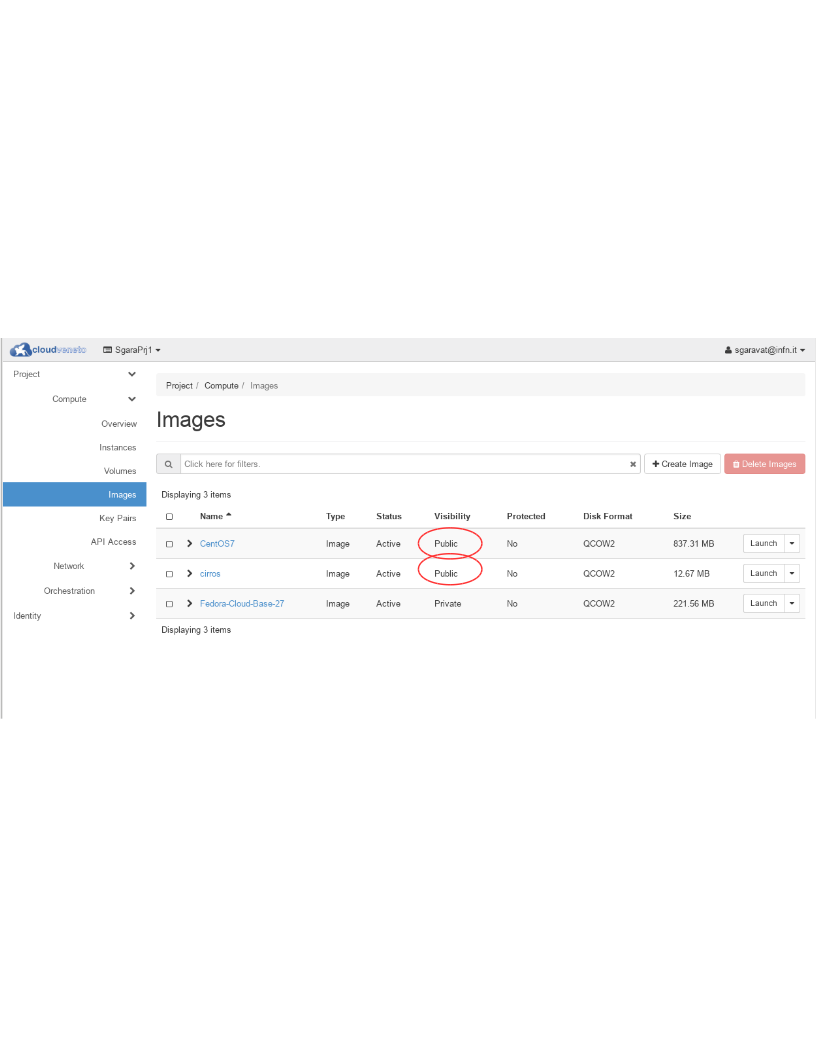
Public images are provided by the CloudVeneto administrators. These images are visible to all users. They appear with Visibility equal to Public in the Compute → Images menu.
Note
Users are not allowed to publish public (i.e. available to all projects) images.
11.1.1. Public Images for INFN Padova users
The <OperatingSystem>-INFNPadova-x86-64-<date> images:
include cloud-init to perform contextualization based on the user data specified when the VM are instantiated
configure CVMFS and the relevant squid servers
allow INFN-Padova system administrators (see INFN-Padova computing and Network service) to log (with admin privileges) on the instance
configure the INFN Padova LDAP server for user authentication. This means that it is just necessary to “enable” the relevant accounts and/or groups using the procedure documented at https://github.com/CloudVeneto/DS389-Script/ and creating their home directories (and changing their ownership). If e.g. you enabled the LDAP user ‘pippo’ to create his home directory:
sudo mkdir /home/pippo
sudo id pippo
The last command will return a string “<userid>(pippo) gid=<groupid>(utenti) groups=….” with the userid and gid to be used in the chown command:
sudo chown -R <userid>.<groupid> /home/pippo
Warning
These images for INFN-Padova users are supposed to be used only by INFN Padova users and only for projects using a INFN (i.e. 10.64.x.0/24 network). They can’t be used on projects using 10.67.x.0/24 networks.
11.2. Private Images
Users can provide their own images and upload them to the Cloud Image service: these images are private, meaning that they are only available to the users of the project they are uploaded for.
Many open source projects such as Ubuntu and Fedora produce pre-built images which can be used for certain clouds. If these are available, it is much easier to use them compared to building your own.
Using an Ubuntu image as an example, after you downloaded the image from the relevant web site, to upload such image proceed as follows:
Be sure you have selected the right Project from the dropdown menu on the top.
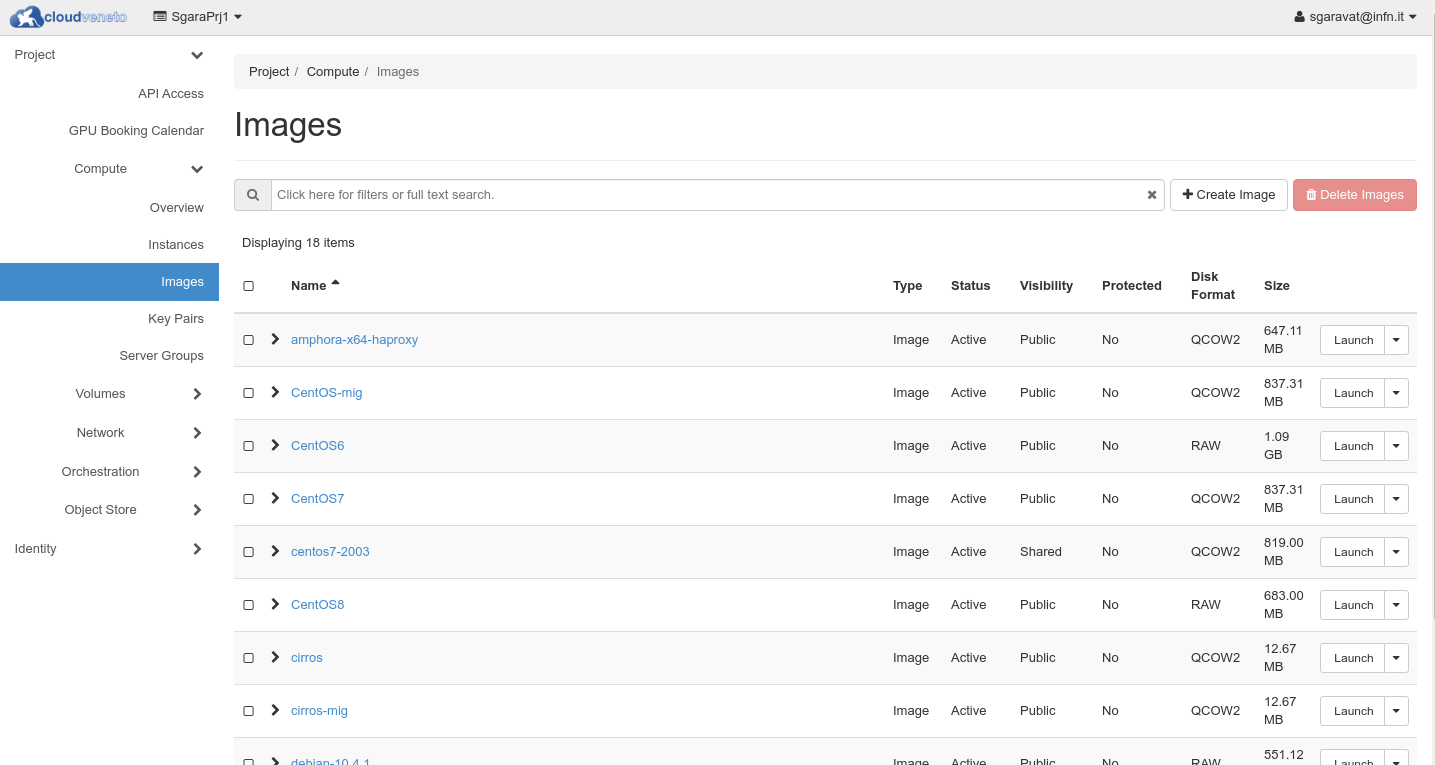
Go to Compute → Images on the left hand menu. This will display the list of public and private images currently available in your project.
Click on +Create Image. The following form will appear:
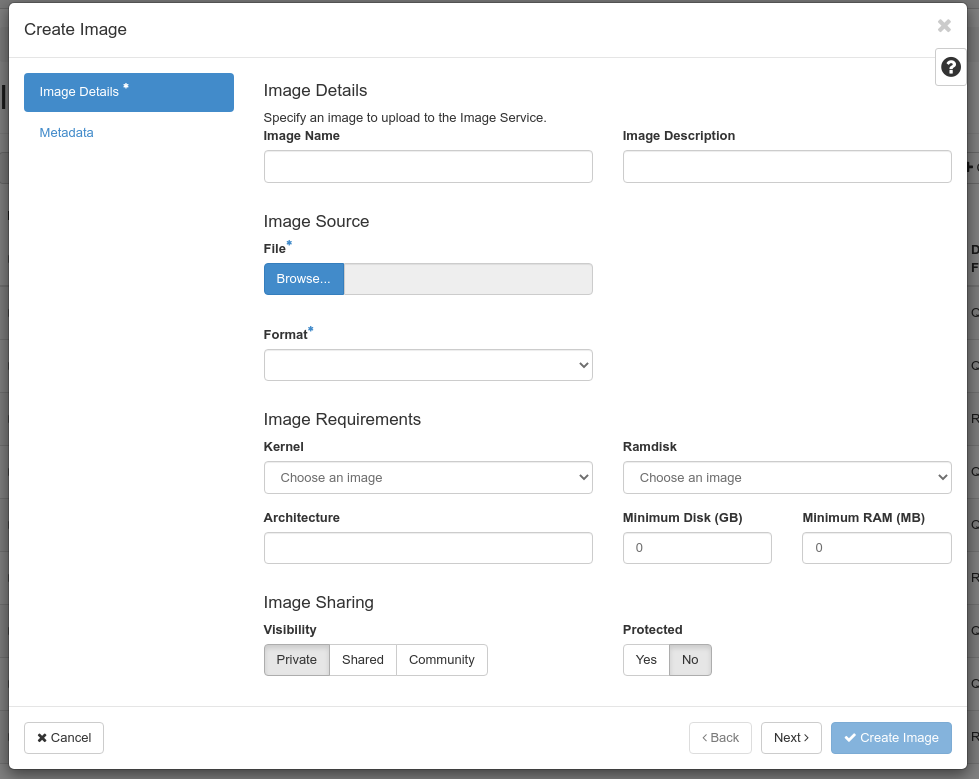
Fill the needed fields. In particular specify a name for this image (to be specified in the Image Name field). Select the downloaded file in the Image Source field, select the Format. Select Private as Visibilility
When done, click on Create Image.
Once loaded, the image can then be used to create virtual machines.
Note
Images are usually provided in several formats. The most used ones in Cloud environments are ‘qcow2’ and ‘raw’.
When considering the format to choose, you should take into account how the instantiation of a virtual machine on a Cloud compute node works. When a virtual machine is instantiated, first of all the relevant image is staged to the target hypervisor, if needed (i.e. if this is the first instance created on that compute node using this image). Then the image is converted to raw, if it is not already in that format.
A qcow2 image is usually much smaller with respect to the same image provided in raw format. This means that:
the registration to the OpenStack image service for images in qcow2 format is faster with respect to images in raw format
the staging of images in qcow2 format to the target compute node is faster with respect to images in raw format
However qcow2 images, as reported above, need to be translated into raw format, and this can take a non negligible time, in particular for images with a large virtual disk size.
Warning
In CloudVeneto image size is limited to 25 GB.
11.3. Shared Images
Important
Images can be shared only by the manager of the project.
The sharing of an image is currently only possible via the command line tools.
If an image has been uploaded to your currently active project, using the procedure described in User Provided Images, you can then use the openstack image add project operation to share that image with another project.
To share an image, first source the project profile for the project containing the image you want to share (e.g. Fedora-Cloud-Base-27) and find its id with the openstack image list command (d4b02b71-755e-47ad-bb27-1ea5c23bf7cb in the example):
$ openstack image list
+--------------------------------------+----------------------+--------+
| ID                                   | Name                 | Status |
+--------------------------------------+----------------------+--------+
| 7ebe160d-5498-477b-aa2e-94a6d962a075 | CentOS7              | active |
| d4b02b71-755e-47ad-bb27-1ea5c23bf7cb | Fedora-Cloud-Base-27 | active |
| 071668fc-dfeb-4956-996a-d2a487755709 | cirros               | active |
+--------------------------------------+----------------------+--------+
You then need to change (to ‘Shared’) the visibility of the image:
openstack image set --property visibility=shared d4b02b71-755e-47ad-bb27-1ea5c23bf7cb
You now need to find the id of the project you wish to share the image with. This will generally be done by looking at the openrc file of that project and finding the OS_PROJECT_ID variable (in this example, it is e81df4c0b493439abb8b85bfd4cbe071).
To share the image with id d4b02b71-755e-47ad-bb27-1ea5c23bf7cb to the project whose id is e81df4c0b493439abb8b85bfd4cbe071, use the command:
$ openstack image add project d4b02b71-755e-47ad-bb27-1ea5c23bf7cb e81df4c0b493439abb8b85bfd4cbe071
+------------+--------------------------------------+
| Field      | Value                                |
+------------+--------------------------------------+
| created_at | 2018-03-19T16:09:21Z                 |
| image_id   | d4b02b71-755e-47ad-bb27-1ea5c23bf7cb |
| member_id  | e81df4c0b493439abb8b85bfd4cbe071     |
| schema     | /v2/schemas/member                   |
| status     | pending                              |
| updated_at | 2018-03-19T16:09:21Z                 |
+------------+--------------------------------------+
Then a member of the target project (with id e81df4c0b493439abb8b85bfd4cbe071 in our example) needs to accept the image:
$ openstack image set --accept d4b02b71-755e-47ad-bb27-1ea5c23bf7cb
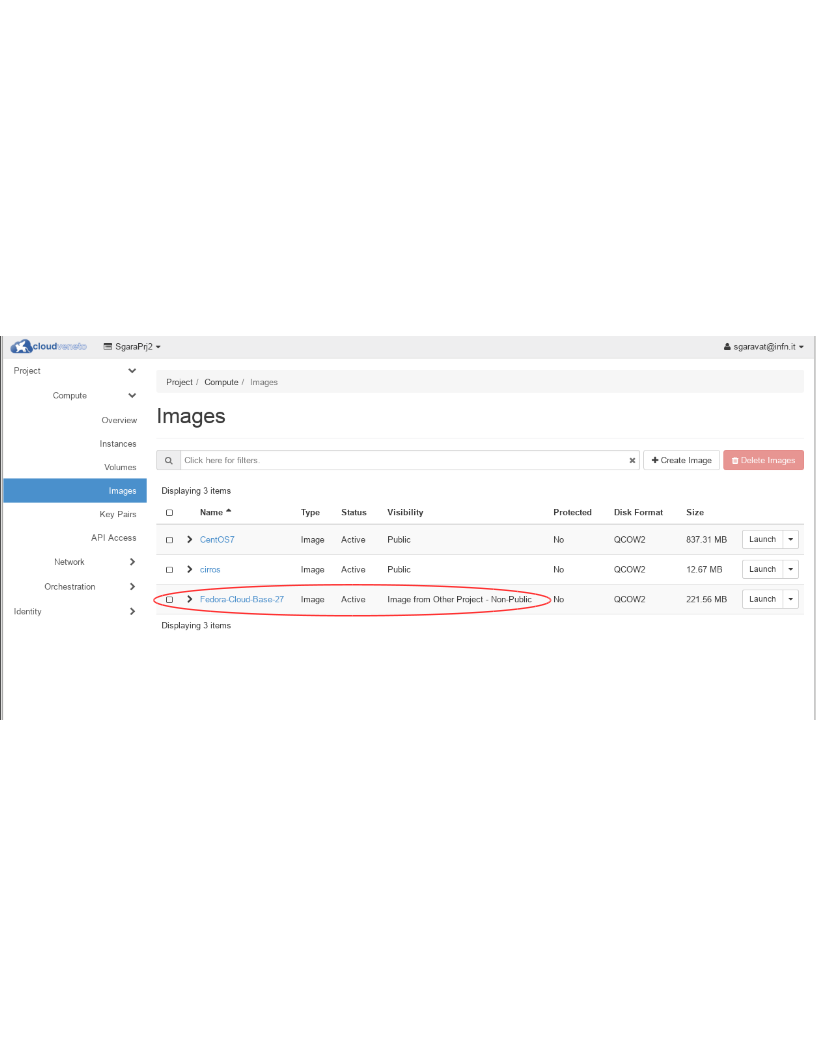
In the target project, the image will appear in the image list:
11.4. Community images
Let’s suppose that a project wants to make a prepared VM image available so that in order to use the project’s software, all you have to do is boot an instance from their image. However they worry about the hassle of maintaining a list of “customers” (i.e. they don’t want to use the image sharing stuff described in the previous section).
The vendor can make the image a community’ image. Such image won’t appear in user’s default image lists of other projects (so they won’t know about it unless they are motivated to seek it out).
The process to create a community image is the one described to create private images (see private images): the only difference is that the Visibility field must be set to Community.
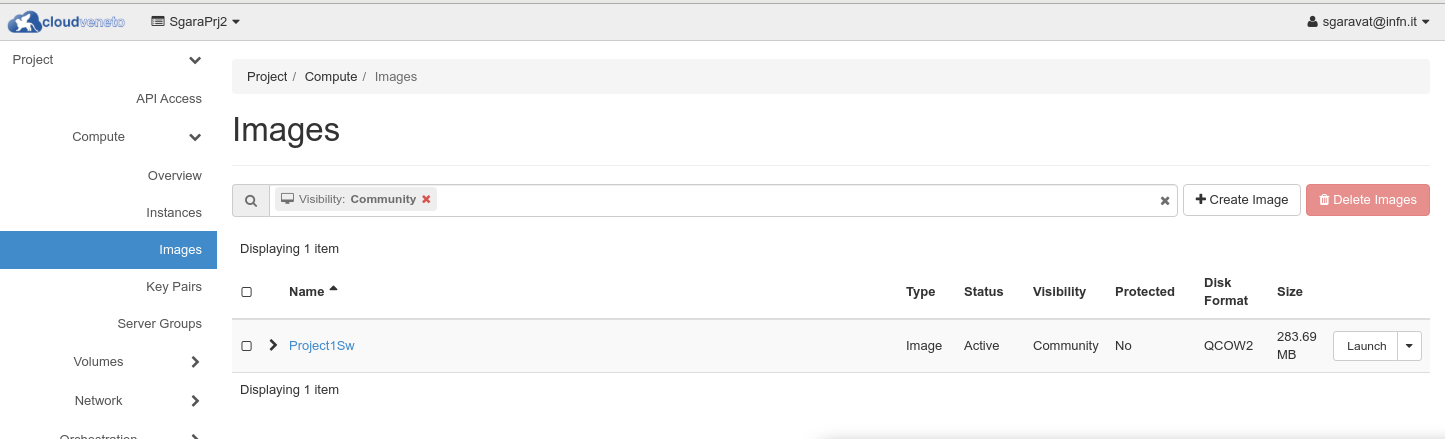
A consumer can find a community image uploaded by another project by doing an image list and filtering with the ‘Community’ value for the ‘visibility’ field.
11.5. Building Images
Users can also build custom images, that can then been uploaded in the Cloud Image service as described in User Provided Images.
There are several tools providing support for image creation. Some of them are described in the Openstack documentation.
One example is virt-customize, which is briefly described in the next subsection.
Please consider these guidelines when creating an image:
Data inside images can be accessed by the other members of the project. So please don’t store sensitive information (e.g. password) in the image.
Please make sure that the cloud-init and cloud-utils packages are installed. This is needed for contextualisation (see Contextualisations), which allows to customize the image after installation.
If you use Fedora, CentOS, or RHEL, the cloud-utils-growpart and gdisk packages must be installed, since they are needed for extending partitions. if you use Ubuntu or Debian, the cloud-initramfs-growroot package, which supports resizing root partition on the first boot, must be installed.
Note
Another possible way to create an image is:
instantiating a virtual machine using an already registered image
applying your own customization on this instance (e.g. installing new packages)
creating a snapshot of this image
using the snapshot to instantiate new virtual machines
However this usually means creating very large and quite inefficient images. Therefore we strongly suggest instead to use the provided public images and applying your customizations using contextualization (see Contextualisations) or to create new images using one of the tools mentioned above.
11.5.1. virt-customize
virt-customize is a command line tool for quickly creating customized images. virt-customize is very easy to install (it is provided by the libguestfs-tools-c package).
It takes as input an image (e.g. one provided by Ubuntu/CentOS/…: see above) and customizes them.
Documentation how to use virt-customize is provided in the relevant man pages.
Here we provide just one example. The following command:
export LIBGUESTFS_BACKEND=direct
virt-customize -a CentOS-7-x86_64-GenericCloud-2111.qcow2 \
  --install epel-release \
  --timezone Europe/Rome" \
  --append-line "/etc/chrony.conf:server ntp.pd.infn.it iburst" \
  --run-command "systemctl enable chronyd" \
  --run-command "sed -i 's/^SELINUX=.*$/SELINUX=disabled/' /etc/selinux/config" \
  --update
  --selinux-relabel
takes as input a CentOS7 image file, called CentOS-7-x86_64-GenericCloud-2111.qcow2 in qcow2 format and:
installs the epel-release package
sets the timezone
configures chrony and enable it at boot time
updates all packages
The resulting image should then be compressed before uploading to Openstack:
export LIBGUESTFS_BACKEND=direct
virt-sparsify --compress CentOS-7-x86_64-GenericCloud-2111.qcow2 centos7-compressed.qcow2
11.6. Deleting Images
Images that are not used anymore can be deleted. Deletion of images is permanent and cannot be reversed.
To delete an image, log in to the dashboard and select the appropriate project from the drop down menu at the top left. On the Compute → Images page select the images you want to delete and click Delete Images. Confirm your action pressing the Delete Images again on the confirmation dialog box.
Warning
Don’t delete an image if there are virtual machines created using this image, otherwise these VMs won’t be able to start if rebooted.
11.7. Migrating an image to another cloud
Sometimes it becomes necessary to migrate an image (or snapshot) from one OpenStack cloud to another one.
In short the procedure is the following:
In the source cloud:
Download the image/snapshot as a file
In the destination cloud:
Upload the downloaded image file to the new environment
To download the image from the source cloud, you need to use the OpenStack CLI. After having sourced the environment script of the source cloud (as explained in Accessing the Cloud with command line tools), run the openstack image list to find the id of the image (photo-slave in the following example):
$ openstack image list | grep photo-slave
| 753e8fa1-3f1b-407d-9294-d22b89ec3184 | photo-slave                 | active |
Then use the openstack image save command, using the relevant id, to download the image file:
$ openstack image save --file photo-slave.qcow2 753e8fa1-3f1b-407d-9294-d22b89ec3184